Unlock the Secret to Perfect Homemade Sandwich Bread
Imagine slicing into a loaf of bread so incredibly soft, so delicately fluffy, that it practically melts in your mouth. This isn't a dream from your favorite bakery; it's the reality of what you can create in your own kitchen! If you've been on the hunt for the ultimate, easy-to-follow sandwich bread recipe, your journey ends here. This comprehensive guide will empower even the most novice baker to master a light, airy loaf that will forever change your sandwich game.
For many, the idea of baking bread from scratch sounds daunting, perhaps even a relic of a bygone era. Yet, a growing number of home cooks are rediscovering the immense satisfaction and unparalleled taste of homemade bread. Making your own white sandwich bread is not just simple; it’s an incredibly rewarding experience that yields delicious results using only a handful of familiar ingredients you likely already have on hand. Gone are the days of mystery additives and preservatives – with this recipe, you control every delicious component.
Why Homemade Sandwich Bread Reigns Supreme
Why bother making bread when store shelves are overflowing with options? The answer is simple: taste, quality, and control. Once you experience the superior flavor and tender texture of fresh, homemade bread, it's hard to go back. Here’s why this particular easy 6-ingredient homemade sandwich bread recipe is a game-changer:
- Unbeatable Flavor: Freshly baked bread has a depth of flavor that commercial loaves simply can't match. The subtle sweetness from honey and the richness of butter create a truly irresistible base for any meal.
- Real, Recognizable Ingredients: With just flour, water, milk, yeast, honey, salt, and butter, you know exactly what you're feeding your family. No unfamiliar chemicals or high-fructose corn syrup – just wholesome goodness.
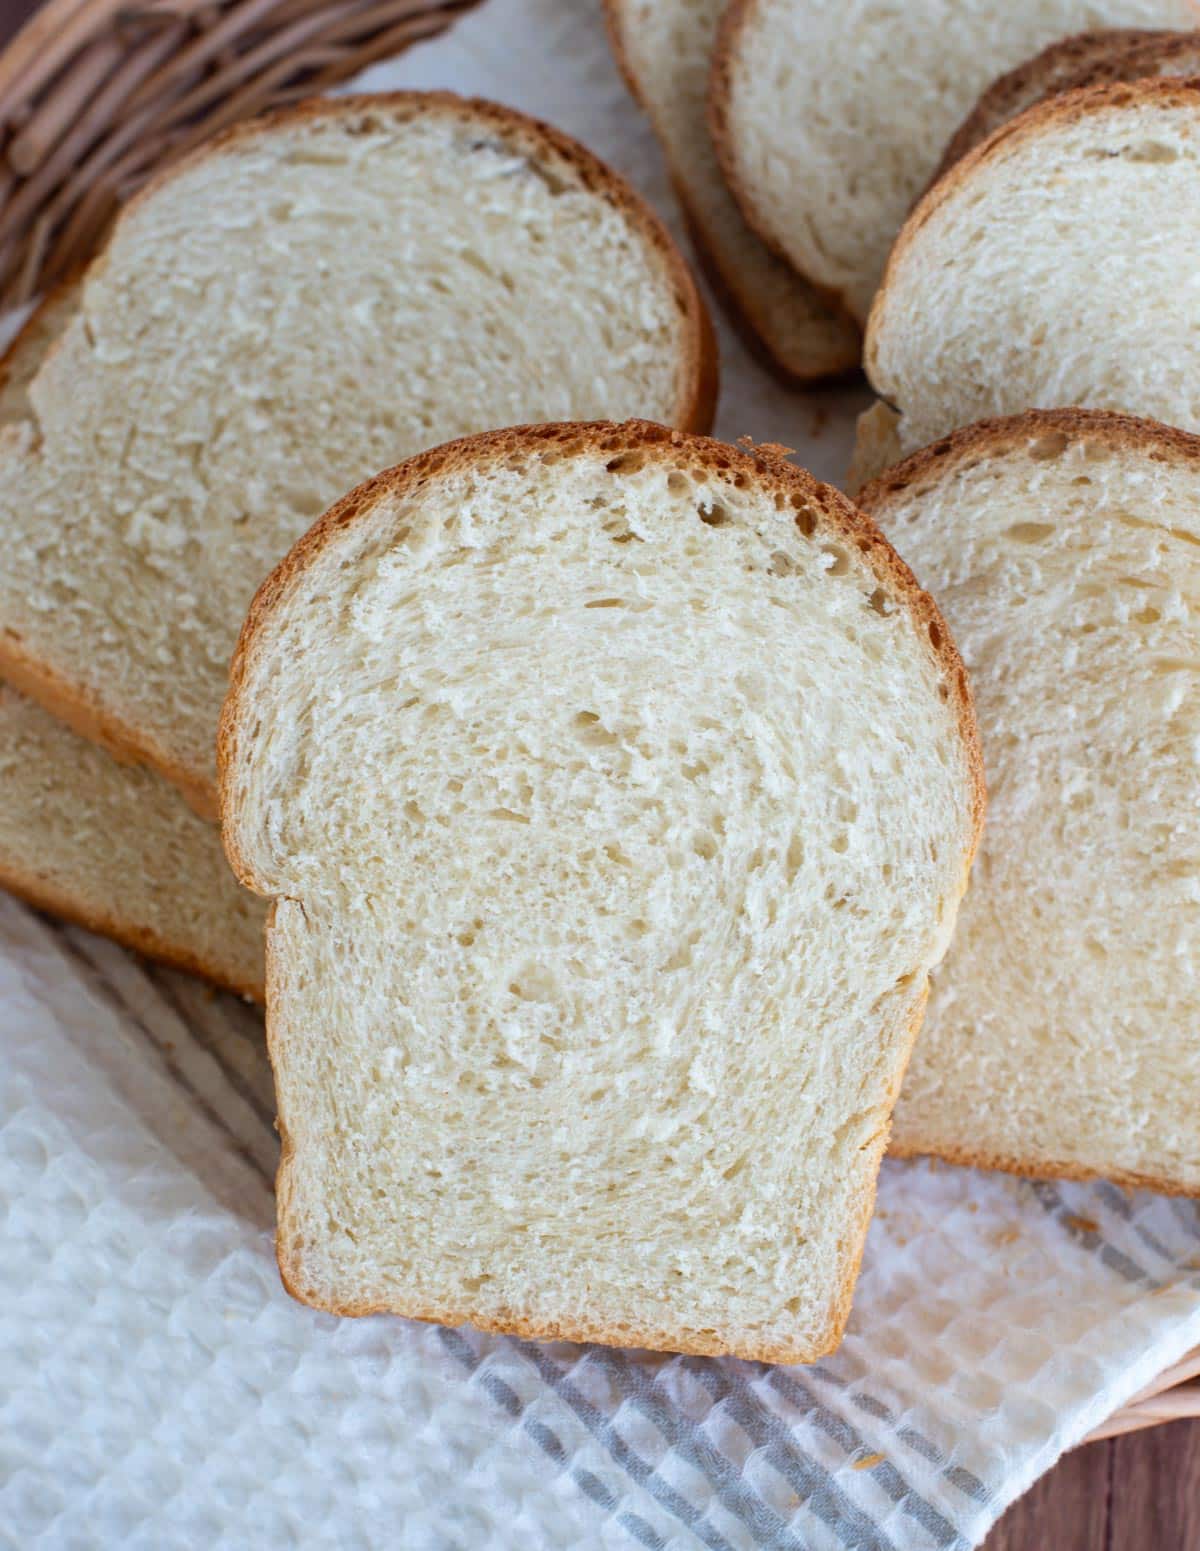
- Superior Texture: This specific homemade sandwich bread recipe consistently produces a soft, pillowy crumb that's easy to slice and holds up beautifully to all your favorite fillings, from classic PB&J to hearty chicken salad or a decadent grilled cheese.
- Economical & Convenient: While the initial time investment is around 3 hours from start to finish, most of that is inactive rising or baking time. Plus, a single batch can keep your freezer stocked, saving you trips to the store and often money in the long run.
Embracing homemade bread isn't just about food; it's about creating a tradition, filling your home with an incredible aroma, and enjoying a product made with care and love. It truly tastes better, feels better, and provides a sense of accomplishment that a store-bought loaf never could.
Your Essential Ingredients (and Smart Substitutions)
The beauty of this simple sandwich bread recipe lies in its minimal ingredient list. You'll be amazed at the magic these everyday staples can create. Here’s a breakdown of what you'll need and how you can adapt it to your pantry or dietary needs:
- Milk + Water: The combination of these two liquids is key to achieving that signature soft and flavorful crumb. Milk adds richness and helps create a more tender bread due to its fats and sugars.
- Substitution Tip: You can successfully make this bread using only water or a non-dairy milk alternative (like almond milk). Be aware that an all-water loaf might dry out slightly faster, and non-dairy milks can vary in their fat content, potentially affecting the final texture slightly.
- Active Dry Yeast: This is the powerhouse that makes your bread rise, creating that lovely airy texture. Don't be intimidated by baking with yeast; it's much simpler than you think!
- Substitution Tip: If you have instant yeast on hand, it will also work wonderfully. Just be mindful not to over-proof your dough, as instant yeast can be more active. Always follow the visual cues in the recipe to know when your dough has risen enough. For more on yeast, check out our guide on Bake Soft & Fluffy Yeast Bread: An Easy Guide for Beginners.
- Honey: Just one tablespoon of honey serves a dual purpose: it activates the yeast, giving it a delicious food source to get started, and adds a very subtle sweetness to the bread.
- Substitution Tip: Granulated sugar can be used as a direct substitute for honey without affecting the outcome.
- Flour: The foundation of any bread, flour provides the structure.
- Substitution Tip: Both all-purpose flour and bread flour yield excellent results with this recipe. Bread flour, with its higher protein content, tends to give the bread a slightly chewier texture and more robust structure. All-purpose flour will still produce a beautifully soft and fluffy loaf.
- Salt: A non-negotiable ingredient! Salt is absolutely essential for bringing out the flavors of the bread and also plays a role in regulating yeast activity.
- Insight: Skipping salt makes for bland bread, and too little can lead to an overly rapid rise. Stick to the specified amount for the best results.
- Butter: Butter contributes richness, flavor, and contributes significantly to the bread's tender crumb.
- Substitution Tip: For a dairy-free alternative, you can substitute olive oil for the butter and use a non-dairy milk or water for the liquid. This simple swap makes the recipe incredibly versatile.
The Simple Steps to a Perfect Loaf: Your Beginner-Friendly Sandwich Bread Recipe
Here’s the complete, step-by-step guide to making the softest, fluffiest homemade sandwich bread. Remember, most of the time is passive, so don't let the clock deter you!
Step-by-Step Instructions:
- Proof the Yeast: In a microwave-safe measuring cup or small saucepan, gently heat the combined milk and water until it reaches between 105°F and 115°F (40°C-46°C). This temperature range is crucial – too cold and the yeast won't activate; too hot and you'll kill it. Stir in the honey (or sugar) and then sprinkle the active dry yeast over the surface. Let the mixture rest for about 5-7 minutes. You'll know your yeast is active and happy when it starts to foam and bubble, forming a creamy layer on top. If it doesn't foam, your yeast might be old or your water temperature was off – it's best to start again.
- Prepare the Dough (Mixing & Kneading):
- Using a Stand Mixer: In the bowl of your stand mixer fitted with the dough hook attachment, combine the foamy yeast mixture with the flour, salt, and 2 tablespoons of softened butter. Mix on low speed until all the ingredients are just combined and a shaggy dough forms. Increase the speed to medium-low and knead for about 8 minutes. The dough should become smooth, elastic, and pull away cleanly from the sides of the bowl.
- By Hand: In a large mixing bowl, combine the yeast mixture, flour, salt, and softened butter. Mix with a sturdy spoon or your hands until a cohesive, shaggy dough forms. Turn the dough out onto a lightly floured surface. Knead vigorously for 10-12 minutes, pushing the dough away from you with the heels of your hands, then folding it back, rotating, and repeating. The dough is properly kneaded when it's smooth, elastic, and springs back when gently poked. For more kneading tips, consult our guide on Bake Soft & Fluffy Yeast Bread: An Easy Guide for Beginners.
- First Rise (Bulk Fermentation): Lightly grease a clean large bowl with a little oil. Place the kneaded dough in the bowl, turning it once to coat the top. Cover the bowl with plastic wrap or a clean kitchen towel. Let the dough rise in a warm, draft-free place for 60-90 minutes, or until it has roughly doubled in size. A good test: Gently poke two fingers into the dough; if the indentations remain, it's ready.
- Shape the Loaf: Gently punch down the risen dough to release the air. Turn it out onto a lightly floured surface. Flatten the dough into a rectangle, about 9x13 inches. Starting from one of the longer sides, tightly roll up the dough into a log, pinching the seam closed as you go. Pinch the ends closed and tuck them under. This tight rolling creates a consistent structure for slicing and prevents large air pockets.
- Second Rise (Proofing): Lightly grease a 9x5-inch loaf pan. Place the shaped dough seam-side down in the prepared pan. Cover loosely with plastic wrap or a clean kitchen towel. Let it rise again in a warm, draft-free place for another 45-60 minutes, or until the dough has risen about 1 inch above the rim of the pan. It should look puffy and feel soft to the touch. While it's rising, preheat your oven to 375°F (190°C).
- Bake: Once risen, place the loaf pan in the preheated oven. Bake for 30-35 minutes, or until the top is golden brown and the internal temperature reaches 200-210°F (93-99°C) when checked with an instant-read thermometer. If the top is browning too quickly, you can loosely tent it with aluminum foil during the last 10 minutes of baking.
- Cool: Immediately remove the bread from the loaf pan and place it on a wire rack to cool completely before slicing. This step is crucial! Slicing hot bread can make it gummy inside, as the internal structure is still setting. Patience here will be rewarded with the perfect texture.
Troubleshooting & Tips for Success
Even seasoned bakers encounter challenges. Here are some common issues and how to overcome them:
- Dense Bread:
- Possible Cause: Yeast wasn't active, dough was under-kneaded, or dough was under-proofed (didn't rise enough).
- Solution: Ensure yeast proofs properly, knead until elastic, and allow ample time for both rises.
- Large Air Pockets:
- Possible Cause: Dough wasn't shaped tightly enough, or too much flour was used during kneading/shaping.
- Solution: Roll the dough tightly when shaping and use minimal flour on your work surface.
- Crumbly Bread:
- Possible Cause: Too much flour, or not enough moisture.
- Solution: Measure flour accurately (preferably by weight), and adjust liquid slightly if dough feels too stiff during kneading.
Pro Tip for Storage: Once completely cooled, store your homemade sandwich bread in an airtight container or bread bag at room temperature for up to 3-4 days. For longer storage, slice the cooled loaf and freeze the slices in a freezer-safe bag. Pop them directly into the toaster for quick, fresh-ttasting bread whenever you need it!
Conclusion
There's an undeniable joy and profound satisfaction that comes from baking your own bread. From the comforting aroma filling your kitchen to the first bite of a tender, homemade slice, mastering this easy sandwich bread recipe is an accomplishment you'll be proud of. This guide has walked you through every step, from activating the yeast to pulling a perfectly golden loaf from your oven. So, ditch the store-bought alternatives and embrace the simple pleasure of baking. Your taste buds, and your family, will thank you for this wonderfully soft and fluffy sandwich bread. Happy baking!
